How to Install WordPress In cPanel Under 2 Minutes
Purchased a new domain & hosting and looking for a quick guide on how to install WordPress in cPanel? Tutorials on the internet are time taking and not good for beginners? Then you are in the correct place. We will help you to install WordPress quickly and effective way you never forget.
WordPress is the most popular content management system in the world right now. WordPress now powers over 34% (as of May 2020) of overall websites on the internet. Everyone loves using WordPress because it’s easy and 1-click to build a website. You can install WordPress in a few clicks otherwise you can choose Bluehost Managed WordPress Hosting for a managed WordPress solution.
Most of the web hosting companies provide you with cPanel hosting which makes things easier for you. For that, you should understand how to install WordPress on Cpanel and take the benefits of cPanel.
In this tutorial, we will show you the complete step by step guide on WordPress installation. We will use Softaculous for WordPress self-hosted installation. It’s easier than manual WordPress installation, save a lot of time and reduce your headache.
So without wasting any more time, let’s begin!
What Is cPanel?
cPanel is a Linux web hosting software which is used as a control panel to manage web hosting server and simplify website management, developed by cPanel L.L.C. It’s easy to use and you don’t have to require any technical knowledge on the command line or Linux utilities. cPanel helps you to manage/publish a website, manage domains, create emails, manage phpMyAdmin, install SSL and much more.
Take a look at it.
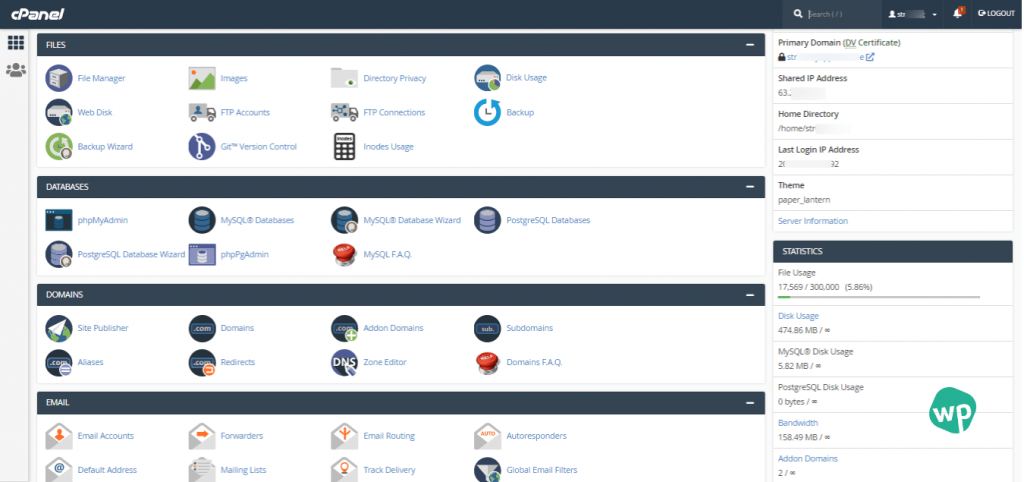
Most of the shared hosting plans have cPanel includes. If you are using shared hosting as a beginner, there will be a probability your host will use cPanel. Using Cpanel do can do the following things for WordPress sites:
- Install WordPress using the automated installer (QuickInstall, Softaculous, etc)
- Install WordPress Manually
- Manage any WordPress website easily using builtin file manager, PHPMyAdmin, etc.
- Fix server errors and update the PHP version in one click.
- Take daily automated backups and many more.
Now let’s find out how to access your web host’s Cpanel.
How To Access cPanel?
So before we proceed and do anything, you need to find out how to access cPanel.
The easiest way to find the cPanel access details is, check your hosting provider’s welcome email after you signed up for hosting. The email contains all valuable login details and direct access URL to your cPanel.
If you didn’t find that welcome email, don’t worry. You can directly ask your hosting provider to send you again or go to your hosting account and find the Access cPanel or Login To cPanel button. It will automatically be logged in to access it.
You have cPanel login details but forget the cPanel URL to access it? Follow the steps given below.
- Go to your browser and type your domain name, append “:2082” or “:2083” at the end of your domain. For example, http://yourdomain.com:2082 (HTTP sites) and https://yourdomain.com:2083 (HTTPS sites).
- Your hosting may set up a custom alias for you, for that type: yourdomain.com/cpanel
If you are a Hostgator user like us, then you can access cPanel directly from your Hostgator account. To find out login to your Hostgator customer account and select your hosting package. There will direct link to access your cPanel. Below is a screenshot how it will look like.
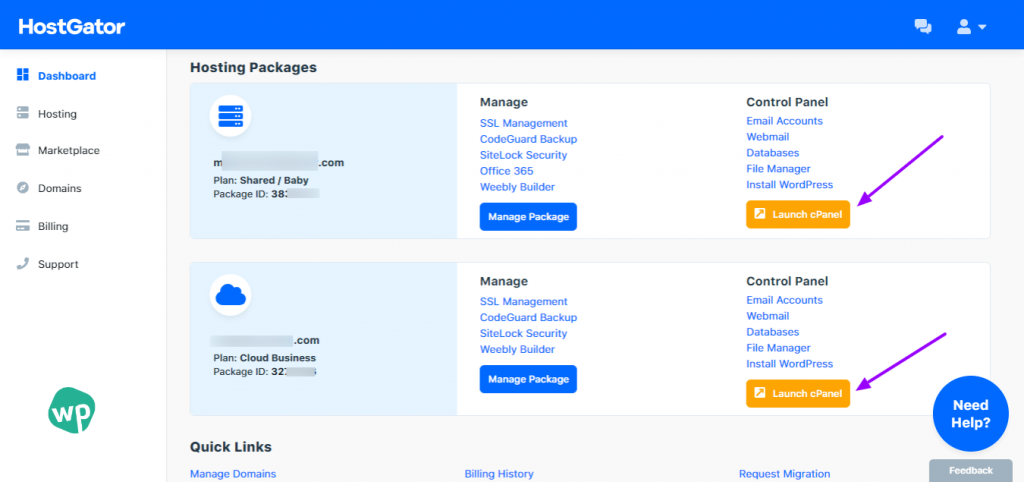
Basic Details Of cPanel
So, now you got an idea about what is cPanel and how to log in there. You see there are lots of options and lots of things to do.
Relax. You don’t have to understand all about cPanel features and how it works. We are here to do one simple task – learn how to install WordPress in cPanel.
Let’s check out the tools cPanel provides you for installing WordPress automatically. Tools/scripts sections are usually located at the bottom of the page.
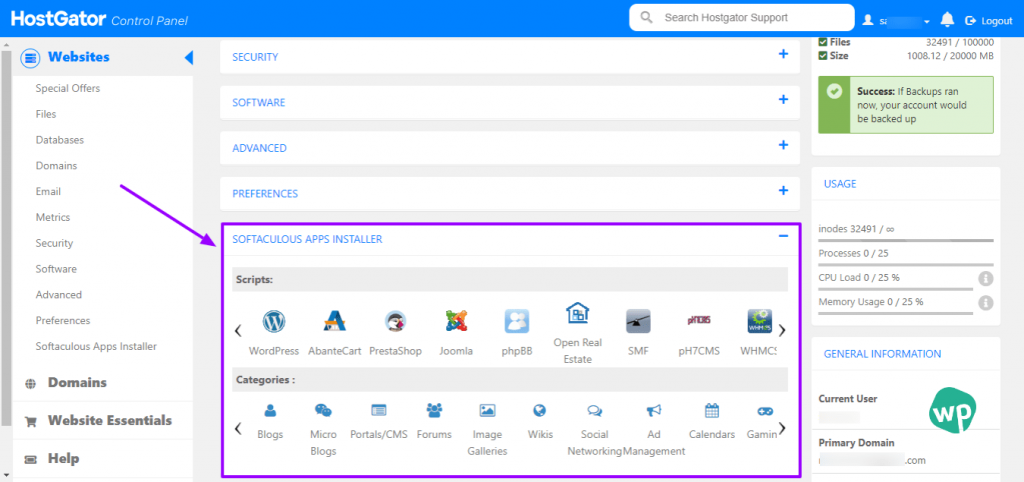
Depending on your hosting provider, your cPanel might be using any the following auto-installers: Softaculous, QuickInstall, Mojo Marketplace, or Fantastico.
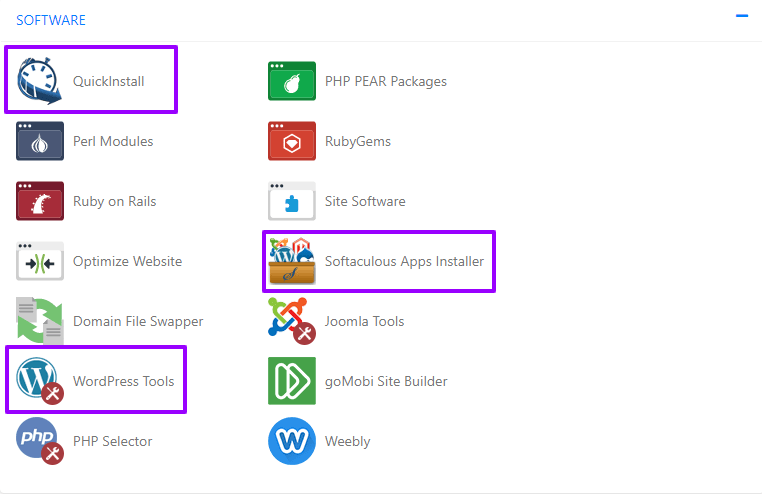
For this tutorial, we will only focus on Softaculous since its the most popular auto-installer script and most of the hosts include it.
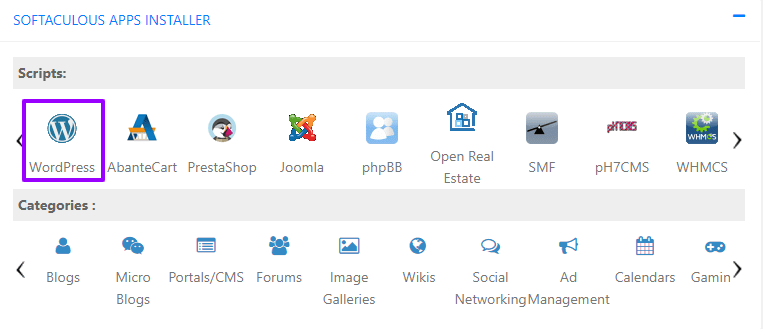
But don’t worry if your host uses any other auto-installer. The interface might be a bit different but the working principle behind every installer is the same. Soon we will write separate articles for each installer. Till then if you are facing any issue, do comment below. We will be there to help you.
How to Install WordPress Using Softaculous?
To install WordPress in cPanel using Softaculous, login to your cPanel and look for it on software or WordPress Tools section. Or you can directly search it on the cPanel search bar.
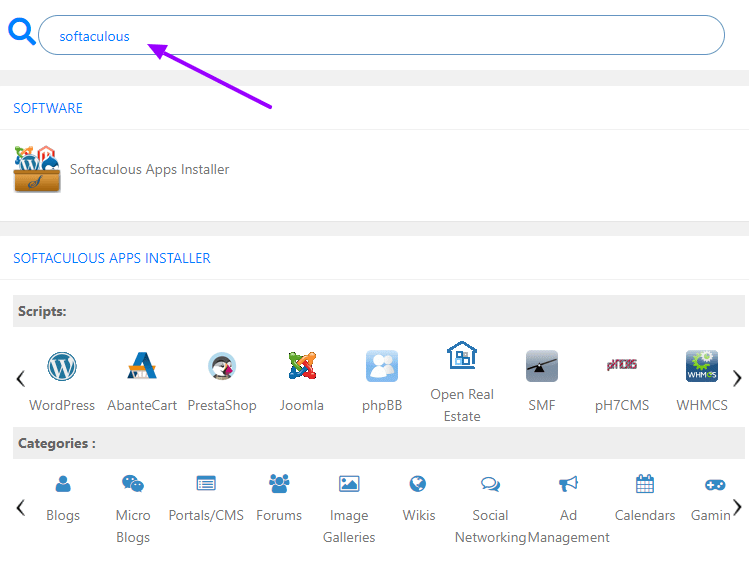
Click on the Softaculous icon and it will launch Softaculous auto-installer for WordPress. There will be lots of options there, choose WordPress, and click on the Install tab to continue with the installation process.
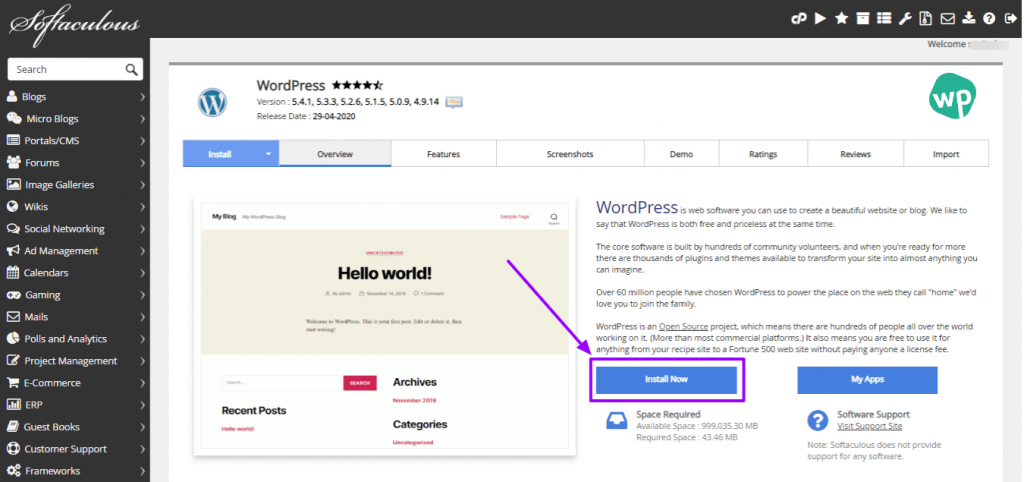
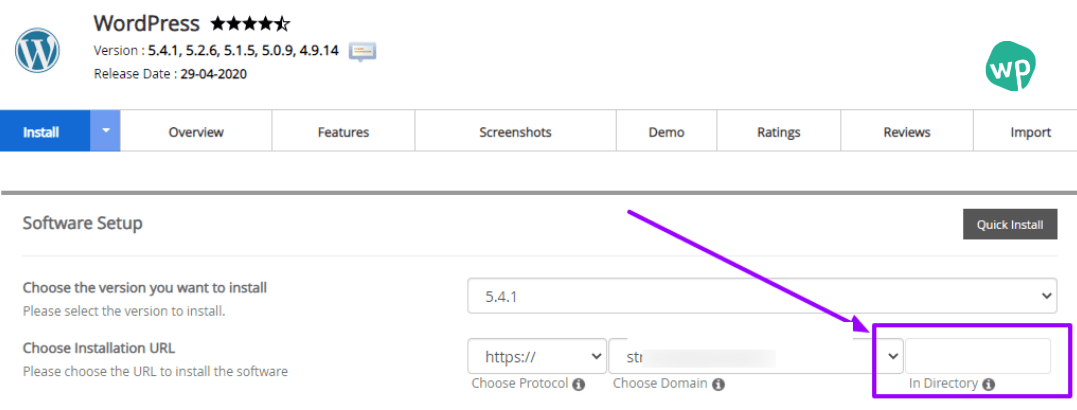
Now Softaculous will ask you to provide some basic details to install WordPress for you. You should pay some attention here.
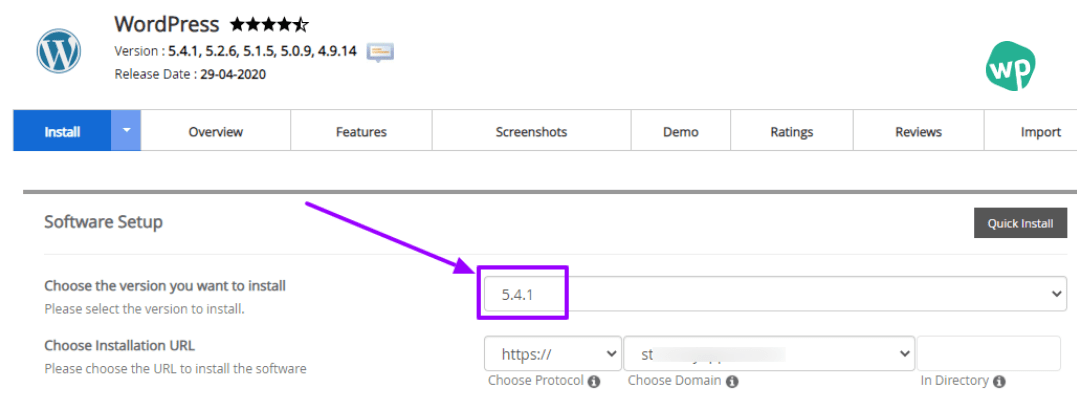
1. “Choose the version you want to install” – Always choose the latest available version. Google for the latest WordPress version.
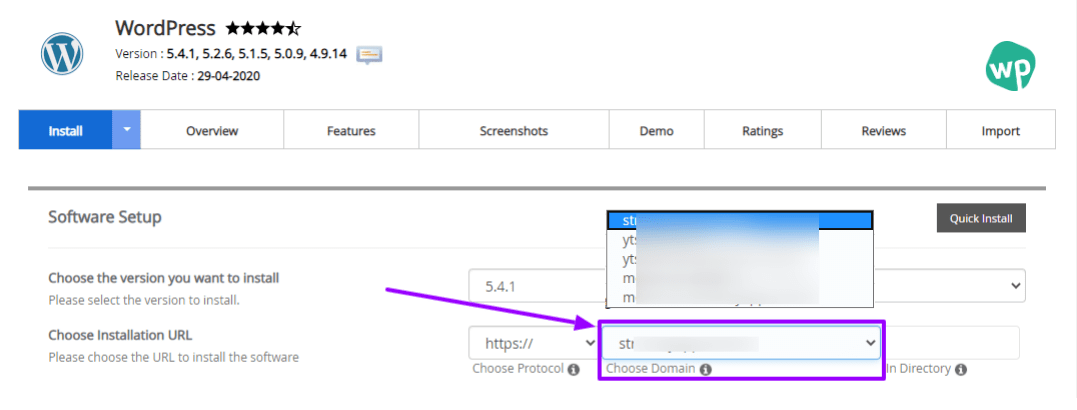
2. “Choose Installation URL” – If you have multiple domains, select the domain where you want to install WordPress.
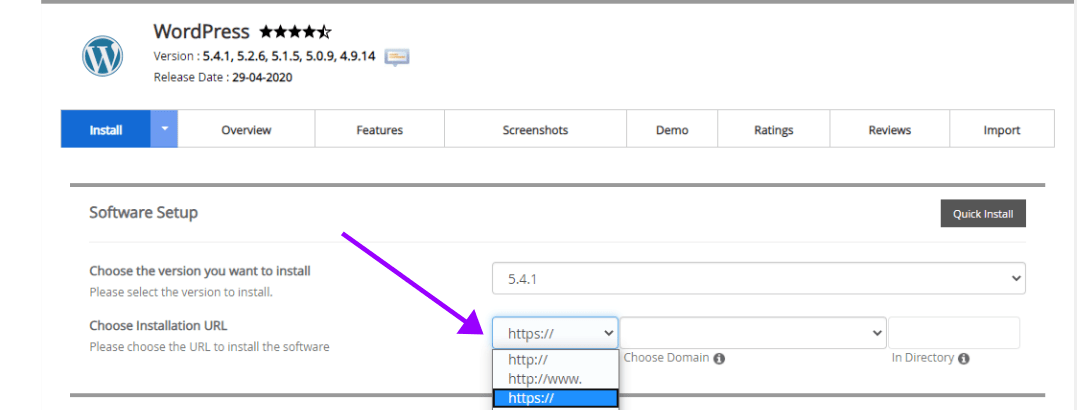
3. “Choose Protocol” – Choose http:// or http://www. as protocol. If your website has SSL and HTTPS, then you must select https:// or https://www. as protocol.
4. “In Directory” – Leave in directory field blank if you want to install WordPress in the domain’s root directory.
5. “Site Settings” – Provide a small title and description for your WordPress website. Don’t worry you can change everything from the WordPress admin section after installation complete.

6. “Admin Account” – Choose admin username, provide a strong password, and email address. Give proper email address otherwise you will face lots of issues later on.

7. “Choose Language” – Select your preferred language for your website.
Leave the rest of the options as it is. Now click on the Install button to proceed.
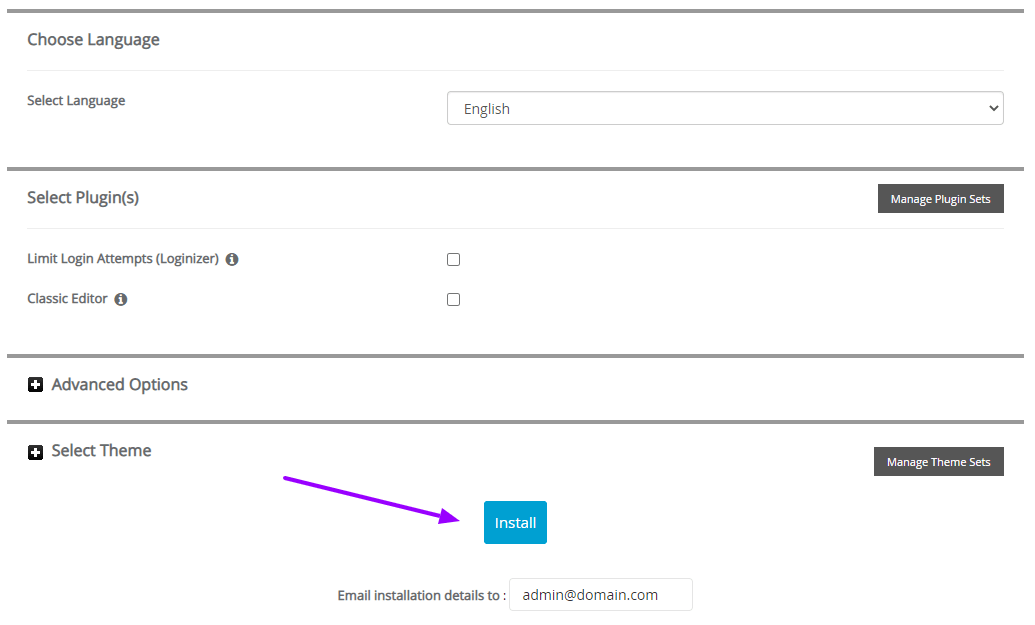
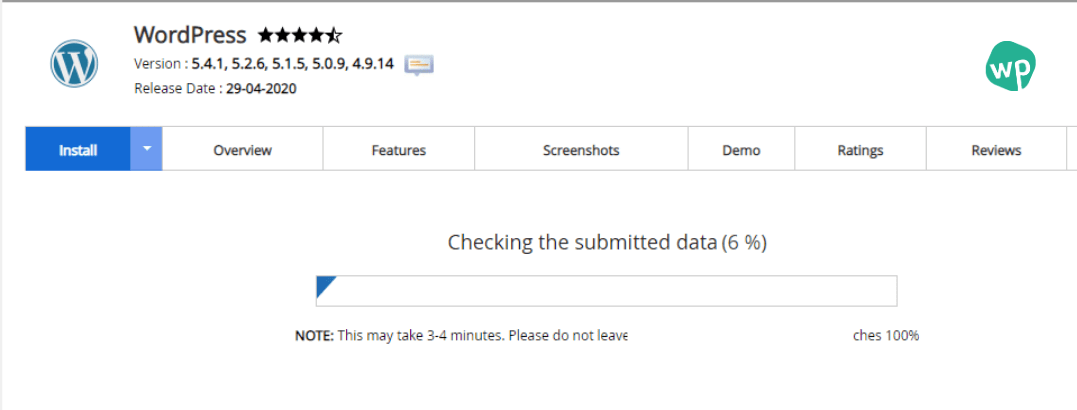
Softaculous will run the auto-installer with the settings you have provided. A progress bar with installation status will appear and it will take a few minutes.
After finish the installation you will see a confirmation message with WordPress login details. Check your email for WordPress admin username and password as well. You should note down the details in a safe place.
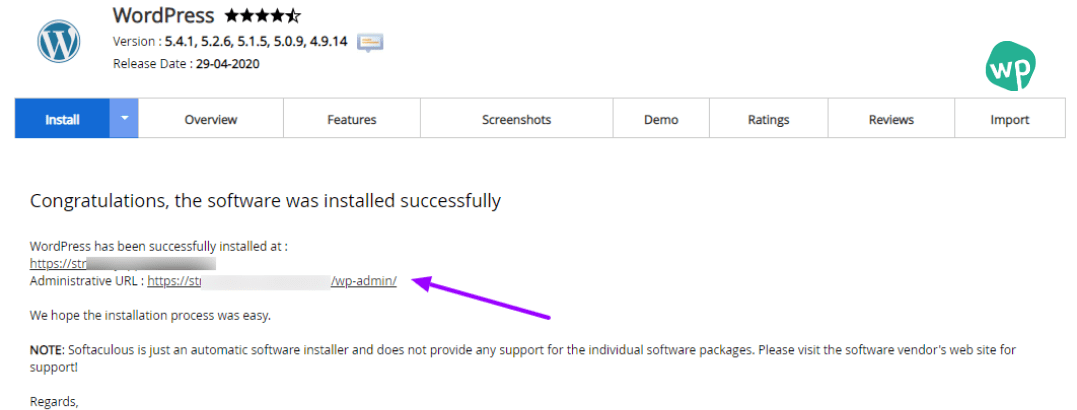
And that’s it. You have successfully installed WordPress using cPanel. You can access your newly installed WordPress website at yourdomain.com/wp-admin.
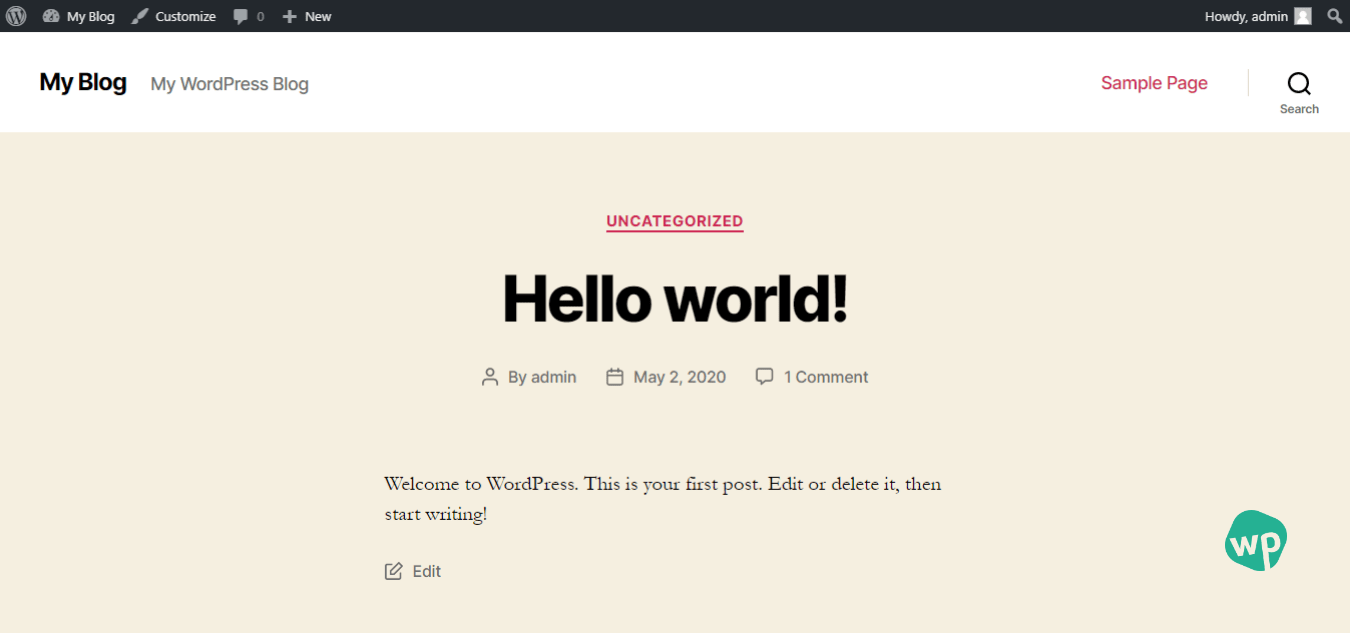
Heres a video guide on how you can install WordPress in cPanel.
Conclusion
We hope this quick guide on how to install WordPress in cPanel helped you to learn something new today. You can also check out the best hosting providers that the WP Recommend team highly suggests to you.
Leave a comment below if you find this article helpful anyway and let us know if you have any questions related to installing WordPress in cPanel. Don’t forget to share it on social media.


